
HANGING YOUR ARTWORK
First, select your print type


MORE TIPS . . .
-
There's actually a "golden height" for hanging artwork - that is 145cm (57") from the floor to the middle of the print. That's the average eye level, and the height that galleries and museums typically hang their pieces. Of course, there are no steadfast rules when it comes to hanging your artwork, but this is a good place to start.
Screw/Nail = 145cm + Print height - Drop
-
For artwork hung above furniture, allow 15-20cm between the top of the furniture and the bottom of your print.
Screw/Nail = Furniture height + 15cm + Print height - Drop
-
I usually design multiple prints to have a 1”/2.5cm gap between each picture.
You can play around with this spacing to suit your home though.
-
Once you've decided on the spacing, hang the main print first
Cut four little strips of painter's tape, each 2.5cm long (or however width you want your gaps to be). Apply these to the wall from the four edges of the hanging print.
Proceed with the arrangement we have designed, repeating this process until all your prints have been hung on the wall.
CANVAS / FRAMED
(with wire hanger)
(with wire hanger)


For Brick, Concrete or Plasterboard (no studs)

For Plasterboard (with studs) or Solid Timber

For Plasterboard (no studs)

For Plasterboard (no studs) - if not using Hooks

Bullet shaped wall plug, for Brick or Concrete


1. Measure the “Drop” by pulling the wire tight like it will hang.
For wider pieces that will have two hanging points, pull up on the wire at both points, then measure to the top of the frame.
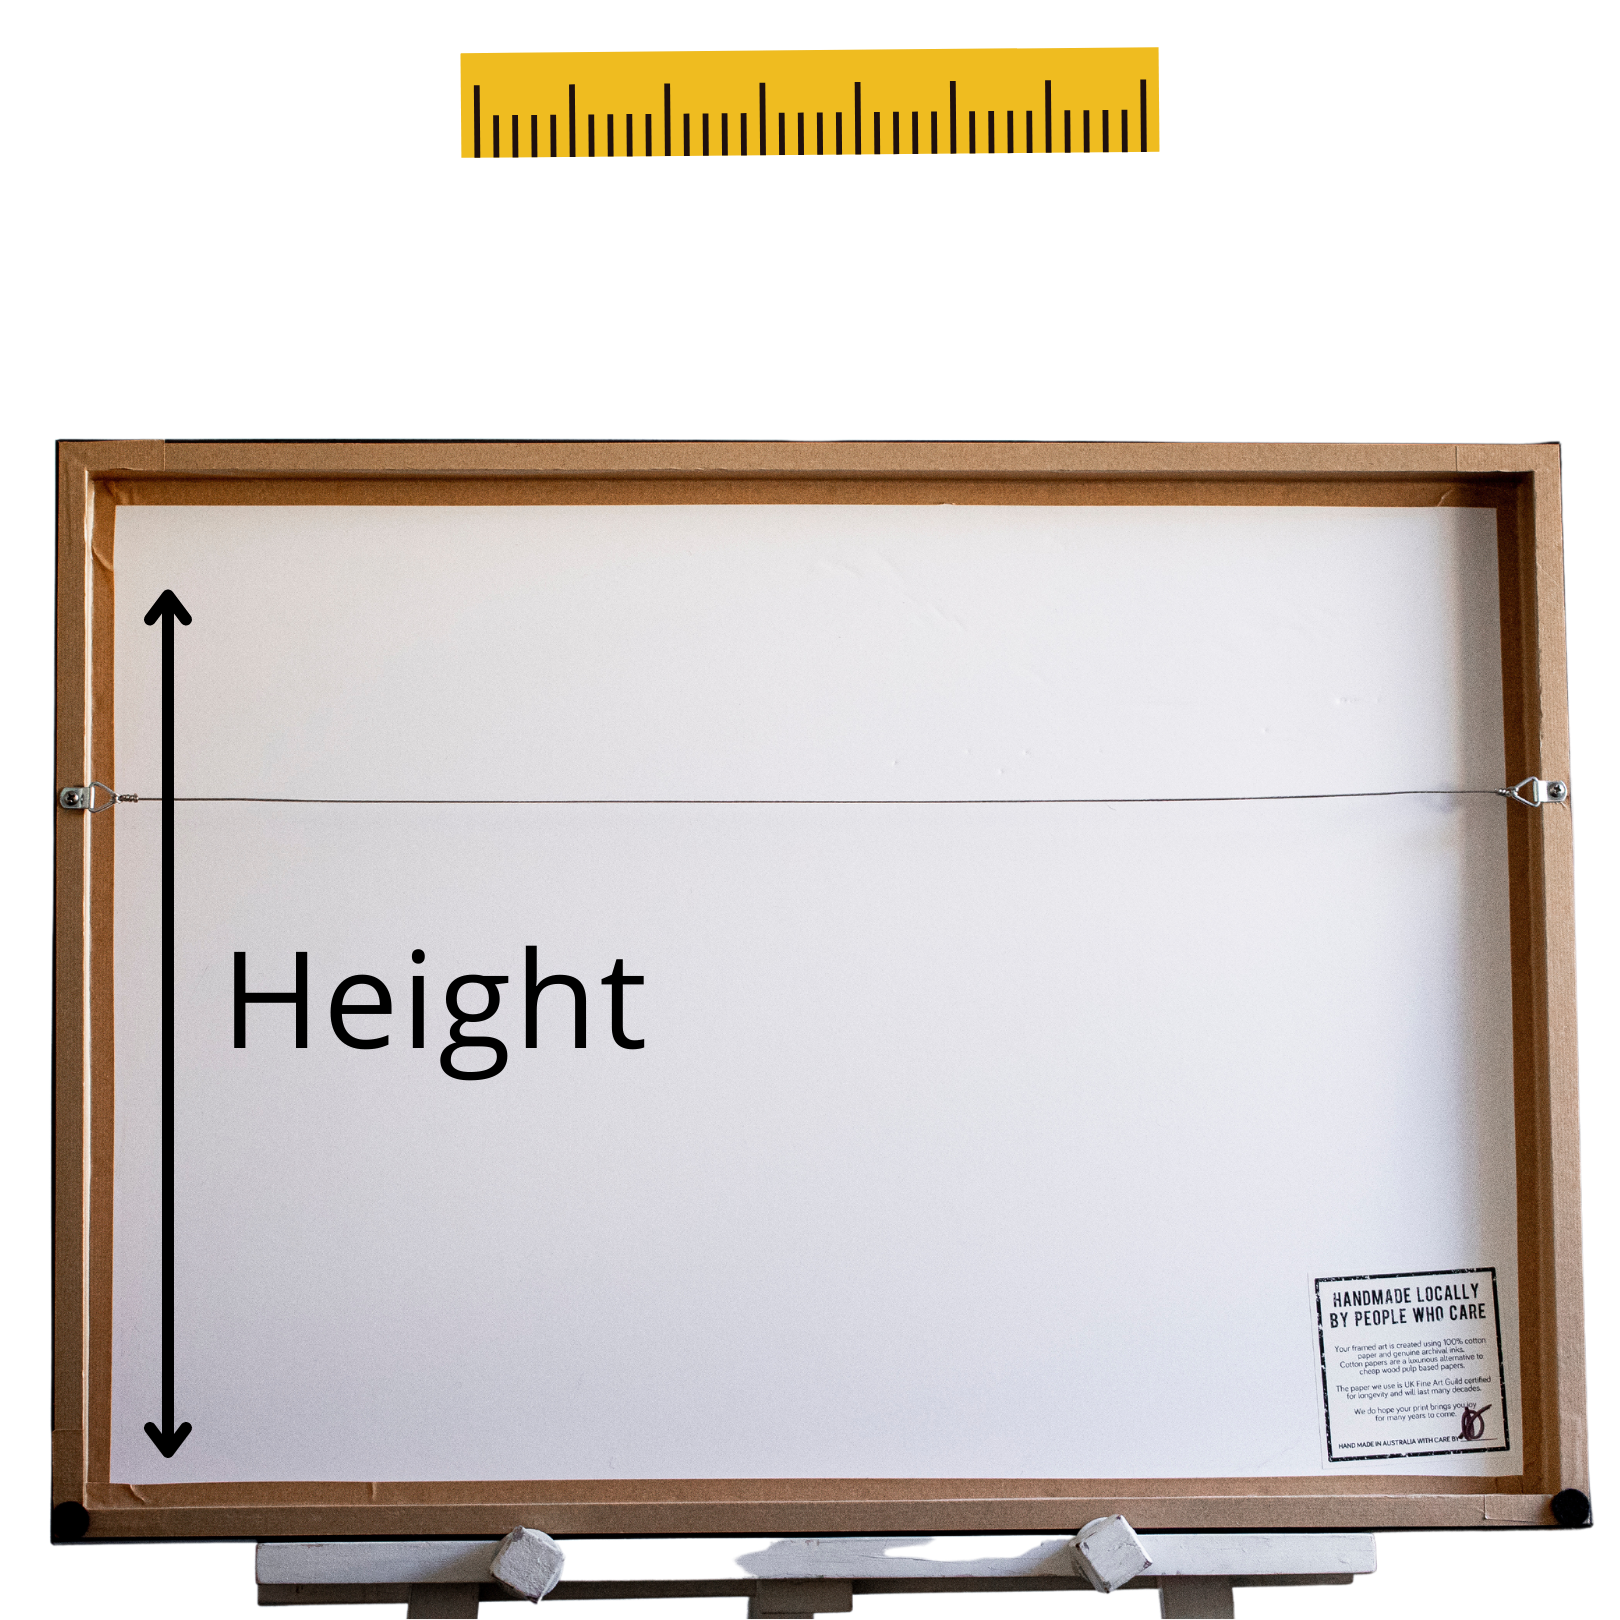
2. Measure the width and height of the print.

3. While holding the print in place on your wall, put a strip of painters tape across the top. Mark each end of the print on the tape.

4. For prints with one hanger, take the width of the print, divide by two, then measure and mark that Centre Point on the painter’s tape.
For prints with two hangers (recommended for extra stability in wider prints), take the width of the print, divide it by 4.
Measure that distance from right and left marks in. Mark your two Centre Points.

6. Measure the “Drop” distance from your Centre Point down. Drill a Pilot Hole here or make a mark with your nail here.
7. Plasterboard (not using studs): 8G Countersunk Screw and Wall Mate or Angle Drive Hook and Nail
Plasterboard (with studs) or Solid Timber: 8G Pan Head Screw
Brick or Concrete: 8G Countersunk Screw and a Wall Plug
CANVAS
(without wire)
(without wire)


Two per print
for Brick/Concrete Walls
Two per print
for Plasterboard without studs
Two per print

1. Flip the D-ring hangers so they are facing up

2. Apply a strip of painter’s tape across the back of the canvas, so it is spanning the entire width and covers both D-rings
3. Poke a small hole through the tape to mark the top of each D-Ring.

4. Take another piece of tape and use it to measure the distance from the top of the D-ring to the middle of the canvas. Cut the tape to the correct length

5. Measure the height from the floor/furniture that you want
6. Stick your shorter piece of tape above this height

7. Stick your longer tape across the top of the shorter piece.
8. You can use a spirit level to check that it’s perfectly straight, and adjust by peeling off and reapplying if necessary

9. Drill a pilot hole through each hole that you marked on the tape
10. Screw in a 8G Panhead Screw through each hole, leaving a small amount sticking out to hang the canvas
* For Brick or Concrete Walls, also use two bullet-shaped Wall Plugs
* For Plasterboard without using studs, also use WallMates. You do not need a pilot hole when using WallMates
11. Peel off the tape and discard it. You can now hang your artwork by sliding the screw heads inside the D-rings on the back.
FRAMED PRINT
(without wire)
(without wire)


Two per print
For Plasterboard without studs
Two per print
for Brick/Concrete Walls
Two per print

1. Apply a strip of painter’s tape across the back of the frame, so it is spanning the entire width and covers both clip hangers
2. Poke a small hole through the tape to mark the top of each hanger

3. Take another piece of tape and use it to measure the distance from the top of the D-ring to the middle of the canvas. Cut the tape to the correct length

4. Measure the height from the floor/furniture that you want
5. Stick your shorter piece of tape above this height

6. Stick your longer tape across the top of the shorter piece.
7. You can use a spirit level to check that it’s perfectly straight, and adjust by peeling off and reapplying if necessary

8. Drill a pilot hole through each hole that you marked on the tape
9. Screw in a 8G Countersunk Screw through each hole, leaving a small amount sticking out to hang the canvas
* For Brick or Concrete Walls, also use two bullet-shaped Wall Plugs
* For Plasterboard without using studs, also use WallMates. You do not need a pilot hole when using WallMates

10. Peel off the tape and discard it. You can now hang your artwork by sliding the clips over the flat head/countersunk screw.
WOOD PRINTS


For Plasterboard without studs
For Brick or Concrete walls

1. As wood prints can be quite heavy, I recommend you try to hang larger prints where studs are located (if possible).
Using wall anchors or wall plugs will disperse the weight of the print.

2. Measure the “Drop” on the back. This is the distance from the top of the recess, to the top edge of the print.

3. Measure the Height and Width of the print (this will also be on your order invoice)

4. While holding the print in place on your wall, put a strip of painters tape across the top. Mark each end of the print on the tape.

5. Take the width of the print, divide by two, then measure and mark that Centre Point on the painter’s tape.

6. Measure the “Drop” distance from your Centre Point(s) down. Drill a Pilot Hole here.
7. For Plasterboard (not using studs), insert aWall Mate
For Brick or Concrete walls, insert a Wall Plug
8. Screw in an 8G Countersunk screw, leaving enough to hang your print (about 7mm)
METAL PRINTS


Metal prints have an aluminium hanging system attached to the back - the channel at the top will sit over a standard flat head screw.
They are extremely lightweight, so you can also use 3M Command Velcro Strips (see appropriate weight guide).
Approximate weight guide:
8x12" - 500gms
16x24" - 1.1kgs
20x30" - 2kgs
40x60" - 6.5kgs
12x12" - 600gms
20x20" - 1.5kgs
30x30" - 2.8kgs
40x40" - 4.5kgs